-
Written By Amit Chandel
-
Updated on August 28th, 2025
Two Best Ways to Migrate Gmail Email to Office 365 in 2025
Summary: When an individual wants to keep all his scattered data in one place then Office 365 is the best option because it stores emails and attachments along with all other files and folders. However, it is not easy for Gmail Users to change their preferred email client to Office 365 when they greed for more features in Office 365. Therefore, here you can explore a tried solution to migrate Gmail email to Office 365. Either you can go with a manual approach or try a professional Gmail Email Backup Tool to move all emails from Gmail to Office 365. Let’s explore the manual approach first because if this approach works, you could save some extra money by not buying the professional tool.
Manual Steps to Migrate Gmail Email to Office 365
There are six major steps that you will have to follow for transferring Gmail Emails to Office 365. You will have to follow every step and don’t miss any sub-steps during the Gmail to Office 365 Migration process.
Note: Follow this informative article if you want to transfer emails from one Gmail account to another.
Step 1- Verify Domain
The domain that is used for your Gmail Account has to be verified by Office 365 that it is owned by you. If in case you have Office 365 subscription and you are not using your own custom domain then you can add users to Office 365 once you have created them.
Step 2- Create New Users and Add them to your Office 365 Account
- You should have a relevant license before creating the users and you have assigned each user to a mailbox to start the migration process.
- Open the Admin Center and on the Right Panel Click on Users.
- Now Click on Active Users and then on More Button and choose the Import Multiple Users option.
- If you want to make a Single User Entry then click on Add a user and enter the values manually.
- If you want to Import Multiple Users then you can download a sample Excel sheet and use it to add multiple users.
- Your Excel CSV file should include Username, First Name, Last Name, Display Name, Age, Mobile Number, etc.
- Make sure the User Names in the column should have email addresses.
- Once you make an Excel sheet, click on the Browse button present on the Create and Upload file screen.
- Then click on the Verify button and after getting the confirmation click on Next.
Step 3- Make a List of Gmail Mailboxes you want to Migrate to Office 365
You will have to make an Excel sheet that will have the list of all Gmail Mailboxes you are willing to move to Outlook 365. You should remember the password of every Gmail Account and you can even set temporary passwords for the migration.
- Open G Suite and Sign in to the admin console through your administrator username and password and choose the users.
- In the Google admin center select the list of users.
- Identify each user’s email address by selecting each user and pen down the addresses.
- Then Sign in to the Outlook 365 admin center and select Active users in Users.
- Open the Excel Sheet and Enter the Gmail credentials like email address, username, and password for each mailbox.
- Enter one mailbox per row and save all the details in a CSV file.
Step 4- Create a Migration Endpoint with Gmail IMAP
You will have to develop a communication channel to smoothly migrate Gmail Email to Office 365. Office 365 uses Endpoint which helps to make this connection smoother and simpler for migrating Gmail Mailboxes. You can follow the steps given below to create an Endpoint.
- Open the Exchange admin center.
- Then go to the Recipients and click on migration
- Then expand the Three Dot and click on the Migration endpoints option.
- Now Click the New + option.
- Then select IMAP on the new page.
- Enter the following details on the IMAP migration configuration page.
- IMAP server: imap.gmail.com
- Settings: Default
- Once you click on Next, the migration service will use the settings to make a connection to the Gmail system.
- When the connection works, a new page will open the Enter General Information page.
- Now enter the Migration endpoint name on this page.
- Then Click on New and leave the other two boxes empty.
Step 5- Transfer Gmail Mailboxes by Creating a Migration Batch
Now, you will have to create a migration batch with Gmail Mailboxes to Migrate Gmail Email to Office 365. You can follow the steps given below for creating a migration batch.
- Open the Office 365 Admin Center and click on Exchange in the Admin Centers option.
- Then go to the Recipients and click on Migration.
- Now click on the New (+) option and then on the Migrate to Exchange Online option.
- Choose IMAP migration and then click on Next.
- On the next screen, click on browse and choose the CSV file you created earlier for migration.
- Then click on Next and after the validation, Office 365 will display the Gmail mailboxes.
- Then click on Next Now on the migration endpoint screen, and select the migration endpoint you have created in the above steps.
- Now click on Next and on the IMAP migration configuration window enter the default values,
- Click again on Next and on the Move configuration page, enter the name without spaces in the migration batch box.
- You must also provide the names of the folders that you want to exclude.
- Then Click Add (+) icon to add the folders to the excluded list.
- On the Start batch page, enter the required information and start to migrate Gmail Email to Office 365.
Step 6- Update DNS Record
Almost every email system uses a DNS record that is known as an MX record to find out the exact Email Address for delivering emails. Formerly, your MX Record might be facing your Gmail and you will have to change the point to Office 365 so that if any email is sent to your Gmail Email Address must be received in your Office 365 mailboxes. You can update your DNS Record through the steps given below:-
- Go to Settings on the left panel in the Admin Center.
- Click on the Domains option and choose your domain name.
- If you click on the Add Records for Me option then this option will connect to your DNS domain and update the MX records automatically.
- If you click on the I’ll manage my own DNS records then this option gives you the flexibility of inserting a list of DNS entries.
- You will have to click on the 2nd option and add MX Records on your DNS.
Note: The MX record value will be different for every domain. This is how you can move all emails from Gmail to Office 365. All 6 major steps will help you to configure the Gmail Mailbox to Microsoft Outlook 365
Migrate Gmail to Office 365 through an Automated Tool
You have seen that the manual steps can perform the Gmail to Office 365 migration for free but they need a lot of technical expertise and you will have to go through a lengthy process. Therefore, why don’t you try a shortcut that is the Gmail Email Backup Tool? This tool will migrate Gmail email to office 365 in just 6 simple steps. With the help of this tool, users can import Gmail contacts to Office 365. Neither this tool will consume time during Gmail to Office 365 conversion nor it will need a lot of technical expertise. You can perform the migration in just a few simple steps.
6 Simple Steps to Migrate Email from Gmail to Office 365
- Download, Install, and Launch the Gmail Email Backup Tool on your PC.

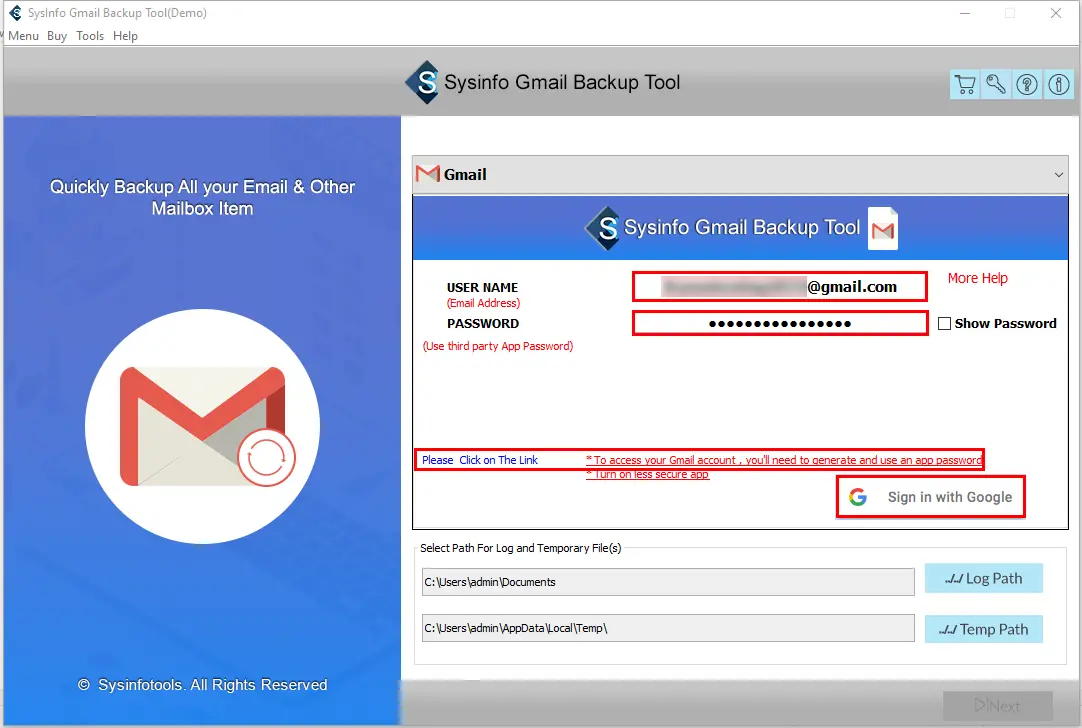
- Provide your Gmail Credentials and log in.
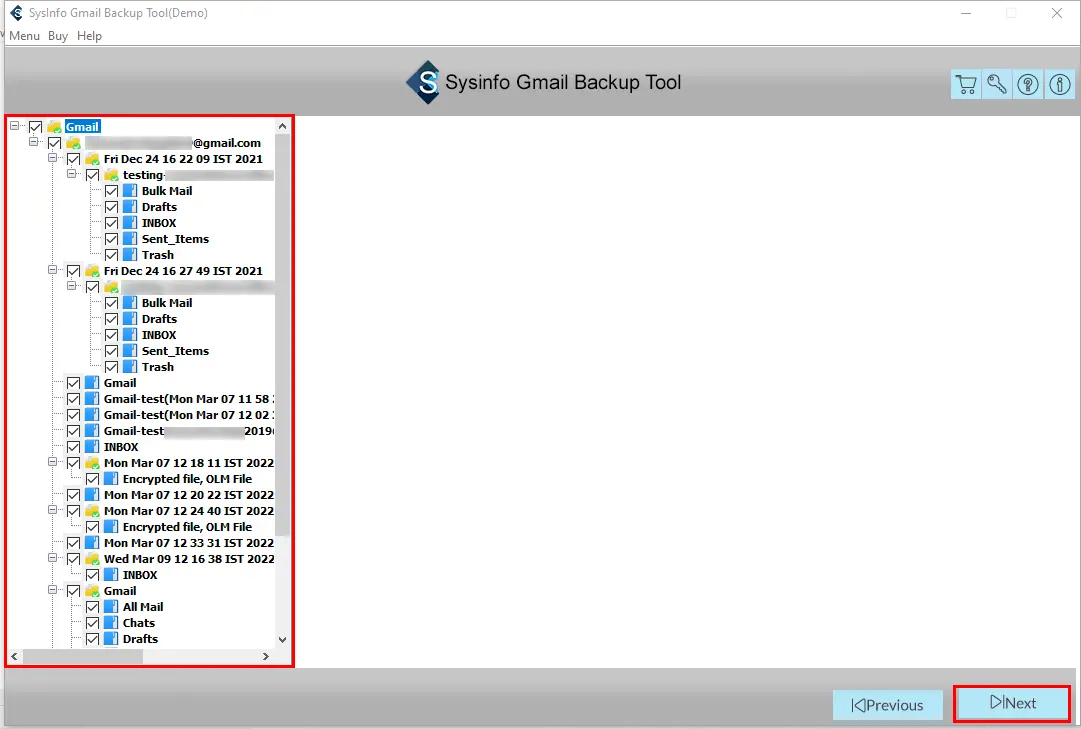
- Choose the Gmail Emails and other Mailbox items that you want to migrate to Office 365 and click on Next.
- In the Save as an option, choose the Office 365 option.
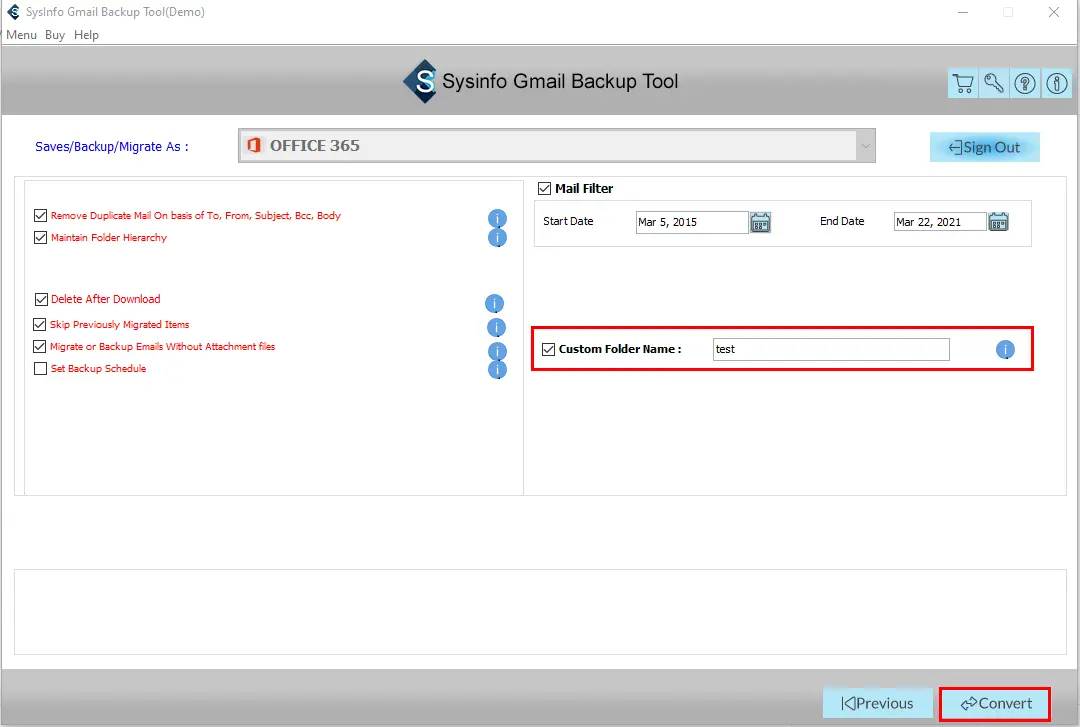
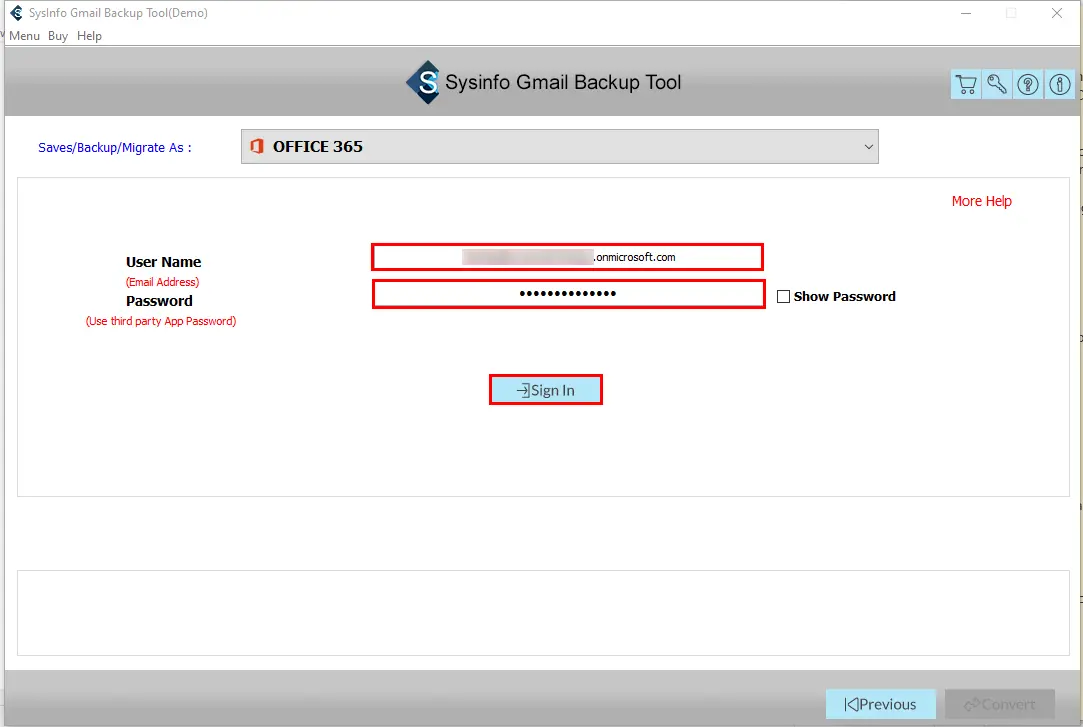
- Enter the Credentials of your Office 365 account and click on the Sign-In button.
- Finally, click the Convert button and the process to migrate Gmail to Office 365.
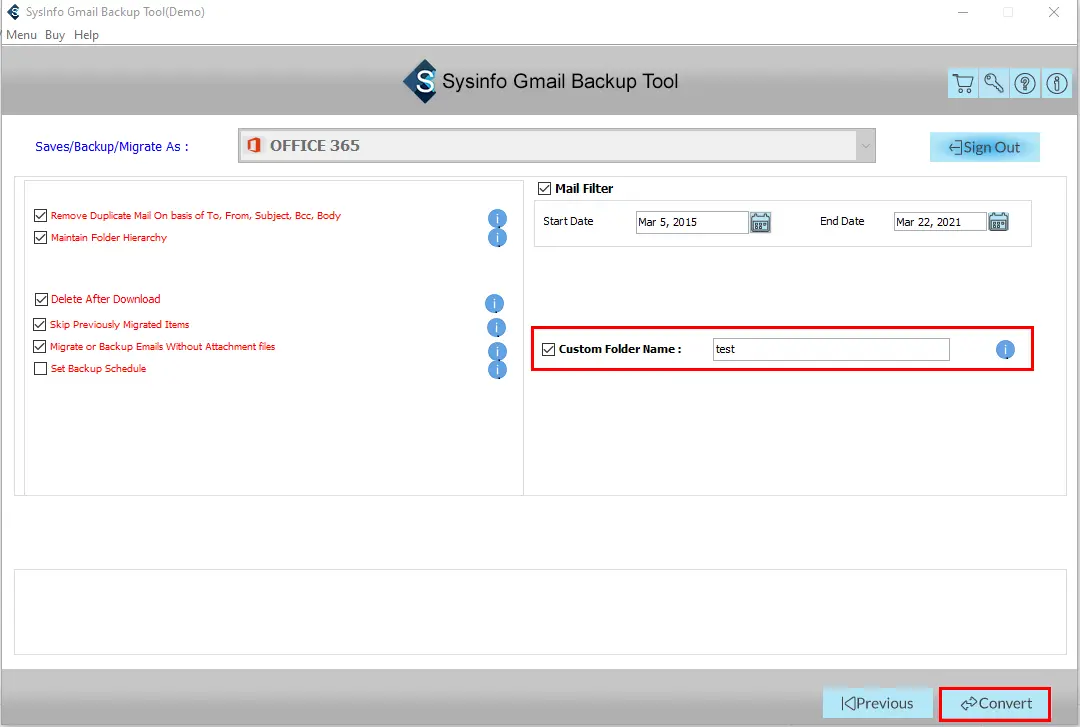
Once the migration process is completed, you will receive a confirmation message. This is how you can transfer Gmail emails to Office 365 using a professional tool.
Explore More: Migrate Gmail to iCloud
Conclusion
You have two detailed explanations to migrate Gmail Email to Office 365. Now, the ball is in your court and you will have to decide which method fits best to resolve your query. Both methods are efficient in their own way and both will work for doing the Gmail Email to Microsoft Outlook 365 Migration.
About The Author:
Meet Amit, an experienced SEO expert and content planner. He uses his creativity and strategy to create content that grabs attention and helps brands reach their goals. With solid skills in digital marketing and content planning, Amit helps businesses succeed online.
Related Post

